You're probably in one of two places right now. You're either getting ready for a shift, doing the usual checks with half your mind already on traffic and delivery times, or you've just finished one and you're thinking back on the near misses that could have turned ugly if you'd been a second slower.
That's where hazard identification lives. Not in a folder. Not in a classroom slide. It lives in the moment you spot a strap that doesn't look quite right, a tyre wall that seems slightly off, or a patch of road that's reflecting light differently after rain.
A professional driver's best safety system is still a trained pair of eyes. Medical eyesight standards matter for that reason, whether you're reviewing UK requirements through this guide on the HGV driving eyesight test or comparing how other jurisdictions handle driver vision checks, such as the Florida drivers licence eye exam. The principle is the same. If you can't see a problem early, you'll only meet it when it's already become an incident.
Your Eyes Are Your Most Important Tool
Years ago, one of the simplest catches I ever saw prevented a very serious day. The driver had done everything people talk about. Tacho set. Paperwork in order. Load notes checked. Then, halfway through his walkround, he stopped at one ratchet strap and looked at it for a second longer than most would. It wasn't hanging loose. It wasn't snapped. It just didn't sit properly.
That second look mattered. The webbing had started to fray where it had been rubbing against an edge. Another driver might have said, “It held yesterday.” A good driver said, “It might not hold today.”
That's hazard identification in practice. It's not dramatic most of the time. It's noticing what's changed, what doesn't fit, and what could go wrong once motion, pressure, weight, weather, or people get involved.
The difference between seeing and looking
A lot of new drivers think hazard identification means spotting obvious danger. Smoke. A warning light. A collapsed pallet. Those are hazards, of course, but they're the easy ones. Developing expertise involves picking up the quieter signs:
A bulge in a tyre wall that hasn't failed yet
A dark wet patch under the trailer that wasn't there before
A mirror angle that's slightly off after parking in a busy yard
A pedestrian path across a reversing area that nobody's marked clearly
A driver's own mood or tiredness changing their judgement
Practical rule: If something catches your eye twice, treat it as a hazard until you've proved it isn't.
The best drivers build a habit of scanning without rushing. They don't just glance. They read the scene. Depot, road, customer site. Each one tells you something if you pay attention.
Why this matters every day
On paper, hazard identification sounds like safety language. On the job, it's what stops property damage, injury, load loss, and the kind of mistake that stays with you for years.
Good drivers don't rely on luck. They create margin. They spot trouble while it's still small enough to deal with calmly.
Why We Identify Hazards The Law and The Logic
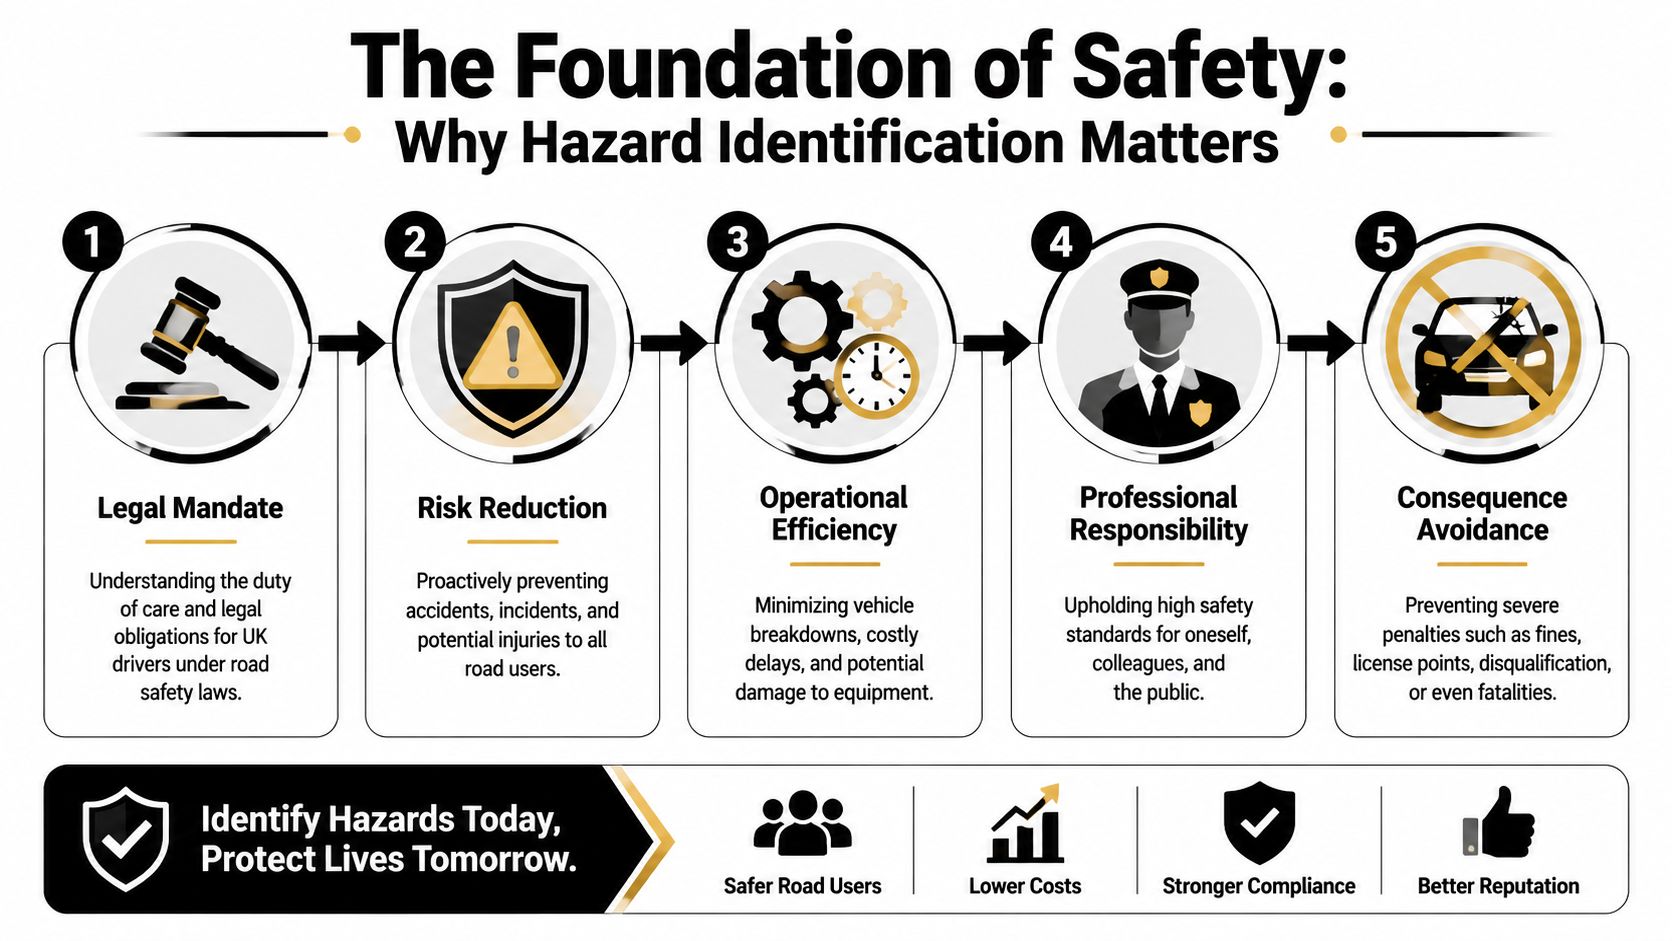
The legal side is straightforward. The Health and Safety at Work etc. Act 1974 established the modern legal basis for employers to manage workplace risks, and guidance tied to that approach tells dutyholders to judge the severity and likelihood of each identified hazard so they can prioritise corrective action, which turns hazard identification into a measurable process rather than a vague safety slogan (hazard identification guidance).
For drivers, that matters because work doesn't become safe just because it's routine. A curtain-side trailer, a tail-lift, a crowded yard, a tight urban turn, a wet loading bay. They're all ordinary parts of the job. They're also places where ordinary work goes wrong when nobody stops to assess what could happen next.
What the law means in plain language
You don't need to talk like a solicitor to work safely. The practical meaning is simpler than that.
When you identify a hazard, ask two questions:
Question
What you're judging
Example
How likely is it?
How easily this could happen in the conditions you've got today
A slippery step in heavy rain is more likely to cause a fall than on a dry afternoon
How severe would it be?
How bad the outcome could be if it does happen
A minor cut and a crushed pedestrian are not in the same category
That's the logic behind a risk matrix. Not paperwork for its own sake. It helps you rank what needs action first.
A loose mudflap matters. A person walking through your blind side while you're manoeuvring matters more. A damaged coupling point or a leaking hydraulic line can move right to the top because the consequences can be severe.
If you deal with plant, lifting gear, or tipper systems, it's worth reading technical guidance outside the usual driver material too. Some practical notes in the MA Hydraulics Ltd safety resources are useful because fluid leaks and pressure systems often get treated as maintenance issues first, when they're also live hazards.
Why drivers need a simple ranking system
Most bad judgement starts with one of two mistakes:
Treating every hazard as equally urgent, which leads to overload and missed priorities
Treating a familiar hazard as normal, which leads to complacency
A simple ranking system helps with both. If the likelihood is low but the possible harm is severe, you don't ignore it. If the harm is minor but the problem is happening constantly, you still fix it because repetition raises risk over a shift or over a fleet.
Safety isn't about being nervous. It's about being organised in how you think.
What doesn't work
What fails on the ground is the tick-box version. A form gets signed, the same stock phrases stay on the sheet, and nobody asks whether conditions have changed since yesterday.
Hazard identification only works when it stays connected to the actual job in front of you. The weather, the load, the site, the traffic, the vehicle condition, and the people around you all change the answer.
Mastering the Pre-Trip Hazard Scan
The walkround is where many preventable incidents should die before the key goes in. Not later on the motorway. Not in a customer yard. Right there, while the vehicle is still parked and you still have options.
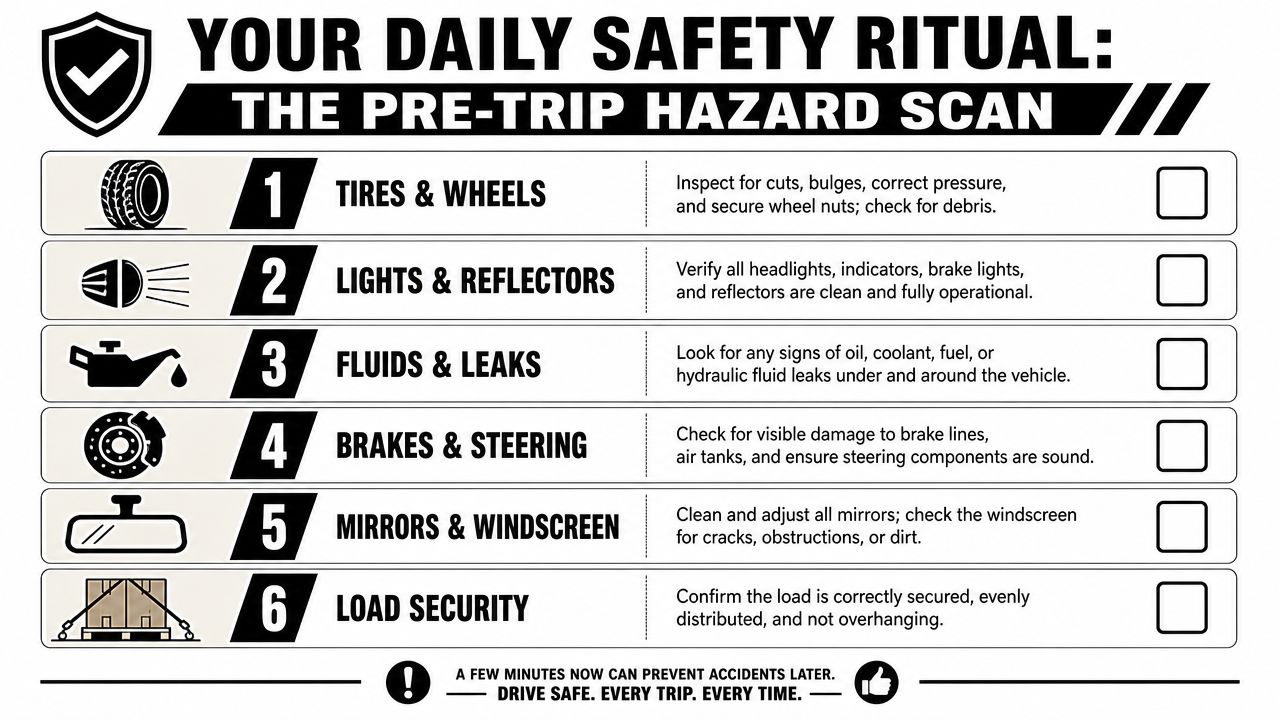
A proper pre-trip hazard scan is a 360-degree sweep of the vehicle and the area around it. It's mechanical, yes, but it's also environmental. You're not only checking what's wrong with the truck. You're checking what could become dangerous once you move it.
Start wider than the vehicle
Before you focus on tyres, lights, and straps, stand back and read the parking space.
Overhead problems. Low beams, hanging cables, tree limbs, open shutters.
Tampering or interference. Open lockers, cut seals, shifted curtains, unsecured doors.
People movement. Yard staff cutting behind trailers, forklift routes, delivery drivers on foot.
Escape space. If something goes wrong, can you get clear safely?
A driver who starts too close often misses the bigger trap. I've seen lads check wheel nuts carefully and then nearly pull into a low obstruction because they never looked up.
For a structured reference point, this HGV inspection manual is a useful companion to daily practice.
Work in a fixed order
The best method is the one you can repeat under pressure. Don't wander randomly. Build a sequence and stick to it.
A solid routine often looks like this:
Cab entry area first Steps, grab handles, door security, mirrors, windscreen condition, camera lenses if fitted.
Front sweep Lights, indicators, number plate, fluid signs under the front end, general stance of the vehicle.
Near side run Tyres, wheel condition, sideguards, body damage, straps, curtains, marker lights.
Trailer and rear Doors, hinges, locking bars, lights, mudguards, tail-lift condition, signs of shifted load.
Off side return Repeat with the same discipline. Don't assume one side tells you everything.
The standard checks are important, but certain hazards keep slipping through because they don't shout for attention.
A pre-trip scan should answer one question: “What could turn ordinary movement into a bad day?”
Pay close attention to these:
Tyre sidewalls, not just tread. Cuts and bulges change fast under load.
Signs of leaks around hydraulic or air systems. Fresh fluid tells a different story from old staining.
Load shift clues. A curtain pulling strangely, a strap angle that's changed, a door harder to close than usual.
Mirror contamination. Fine grime and spray can ruin judgement in poor light.
Small debris near wheels. Chocks, broken timber, banding, metal strips.
Later in the scan, use a visual refresher if needed:
A five-minute check done properly is never wasted time. It's the cheapest, calmest point in the day to find a problem.
Dynamic Hazard Identification on the Move
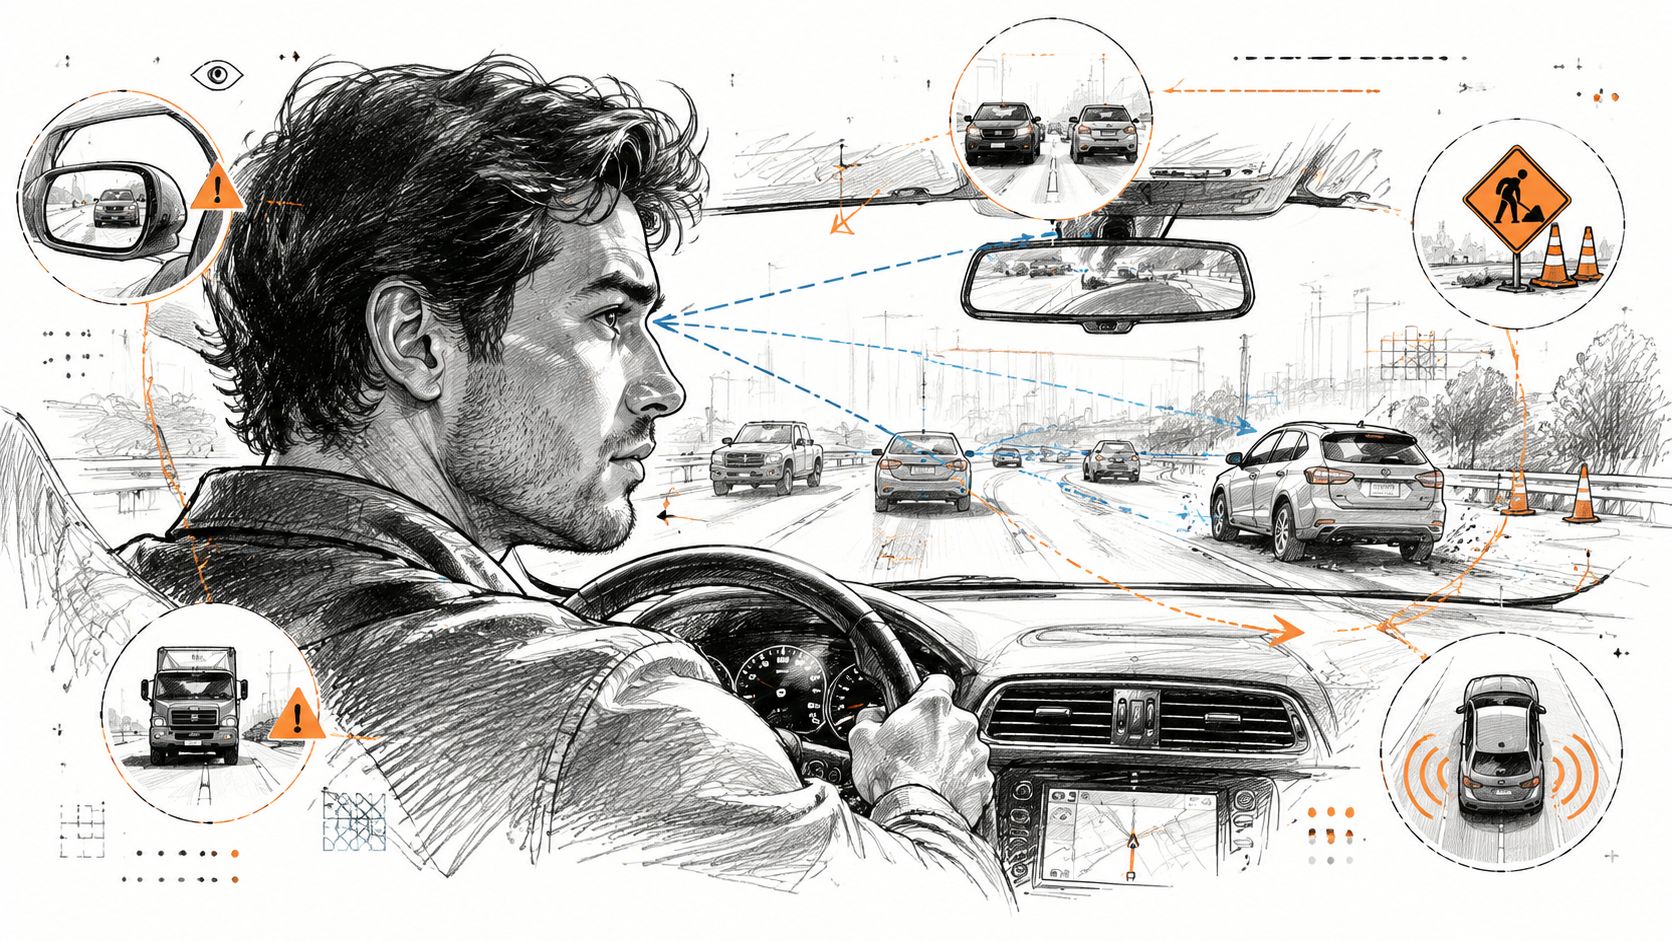
Once you're rolling, hazard identification stops being a checklist and becomes a moving judgement call. The road keeps changing, and so do the people using it. A driver who only reacts to what's directly ahead is always late. A driver who reads what's developing has time to choose.
Research on hazard recognition shows that failures often happen during routine, familiar work, not only in emergencies, and cognitive biases such as overconfidence can distort judgement in normal conditions (hazard recognition and risk assessment). That fits what many experienced drivers already know. The roads that catch you out are often the ones you think you know best.
The reactive driver and the proactive driver
Two drivers approach the same roundabout in light rain.
The reactive driver notices the cyclist late, brakes harder than needed, checks the near-side mirror under pressure, and enters the roundabout tense and rushed. Nothing may happen. Or the whole thing may tighten at once.
The proactive driver has already changed speed on approach because the road surface is shiny, the traffic is bunching, and there's a cyclist moving up through a common blind-side conflict point. Same roundabout. Different outcome because one driver read the pattern earlier.
That's the heart of dynamic hazard identification. You're not waiting for proof. You're watching for signs.
What to watch while the vehicle is moving
A good road scan includes more than lane position and speed.
Surface changes. Wet patches, standing water, diesel sheen, loose gravel near site exits, polished urban roads in rain.
Behaviour cues from other road users. A van edging at a junction, a pedestrian looking at a phone, a cyclist filtering into a pinch point.
Traffic rhythm. Sudden bunching, repeated brake lights, poor lane discipline, impatience around your vehicle.
Your own condition. Slower mirror checks, missed signs, irritation, fixed stare, late decisions.
Familiar roads can be the worst for complacency
The route you've done many times can lull you into lazy assumptions. You stop asking fresh questions. Is that parked car hiding a crossing pedestrian? Has a site exit become busier? Is the wind stronger on that exposed stretch today? Has your stopping margin changed because the trailer's loaded differently?
Cab rule: If you catch yourself thinking “I know this road”, widen your scan, not narrow it.
Cameras, sensors, telematics, and driver aids are useful. They can support awareness. They can't replace disciplined observation. A camera won't understand a pedestrian's hesitation the way an alert driver can. A warning system may tell you something is close. It won't decide whether the whole scene is becoming unstable.
That judgement still sits in the seat.
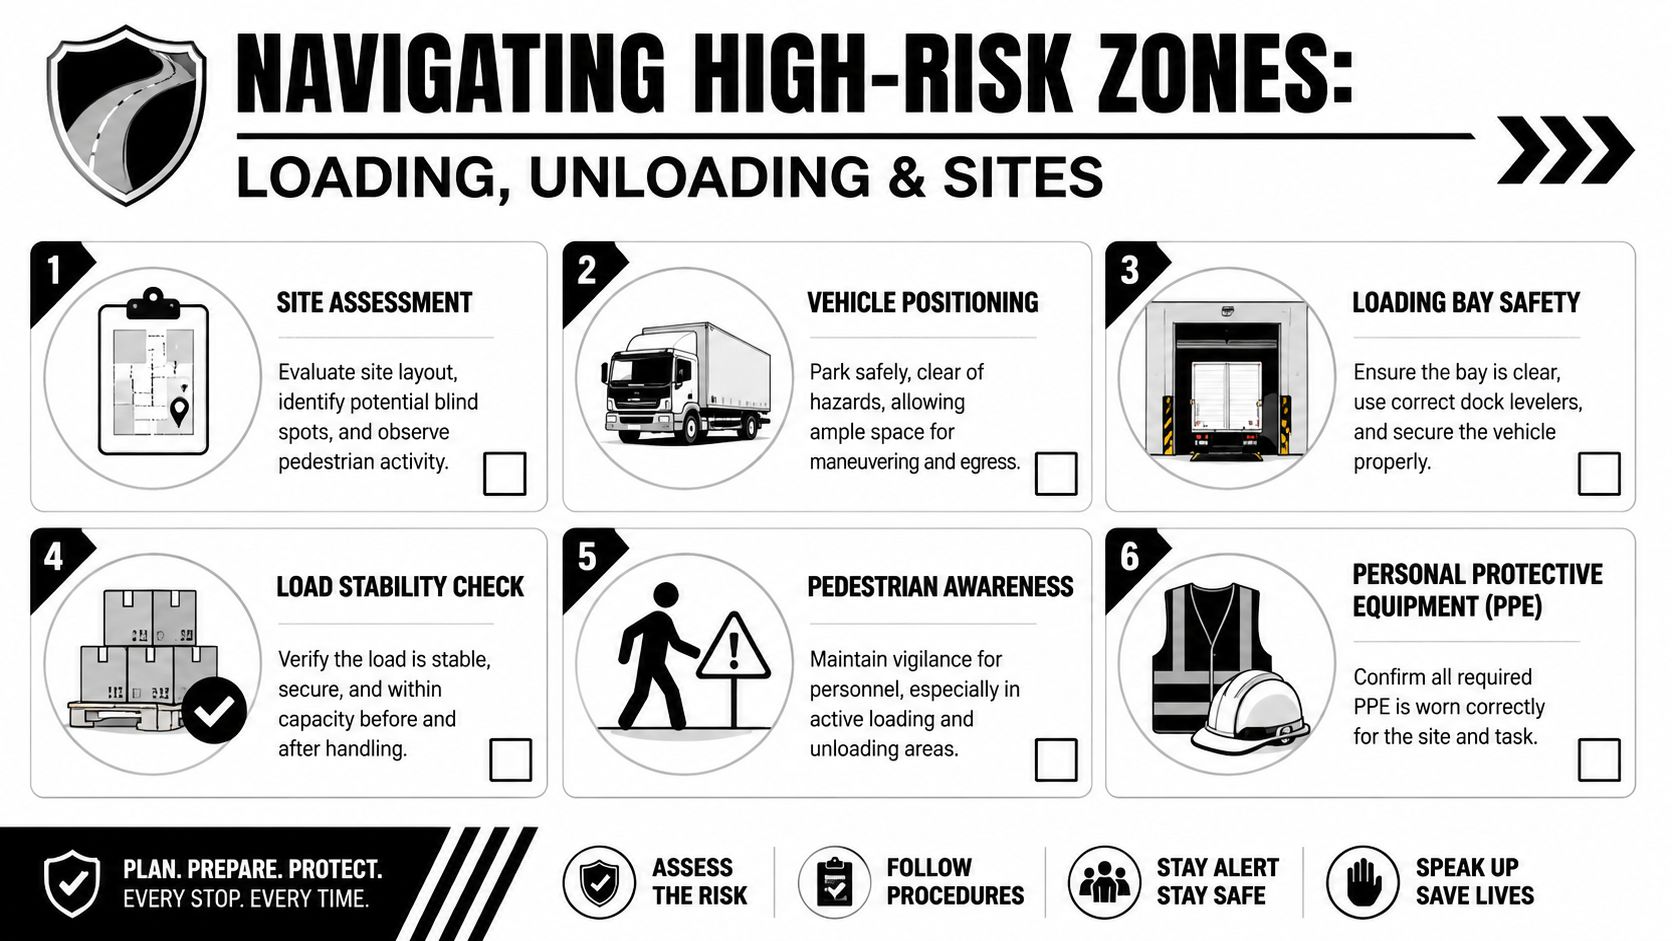
High-Risk Zones Loading Unloading and Sites
Many of the nastiest incidents happen when the vehicle isn't travelling at speed at all. Yards, bays, customer premises, building sites, farm tracks, depot corners. These places are full of mixed movement, unclear lines of control, and people who assume someone else is watching.
In high-risk sectors such as logistics and construction, workers recognised only about 47% of hazards in one study, with even poorer recognition in some less obvious categories (hazard recognition study). That should make every driver pause. If people are missing more than half of what's around them, then site work needs more discipline than most operations give it.
Approaching the site
The hazard scan starts before you enter.
A gate with poor sight lines, pedestrians crossing informal routes, forklifts operating outside marked zones, mud on concrete, poor signage, impatient site traffic. None of that waits for you to park before becoming dangerous.
When approaching a site, assess these points first:
Site factor
What to ask
Layout
Where are vehicles entering, queuing, reversing, and exiting?
Ground
Is it level, broken, soft, wet, or contaminated?
Lighting
Can you see bay edges, people, wheel stops, and trailer gaps clearly?
Control
Who is directing movement, and are instructions actually clear?
A banksman helps only if the system is clear and both sides understand it. Vague waving isn't a safe system.
Positioning and reversing
Reversing is where bad assumptions multiply. Drivers assume the path is clear because it was clear moments ago. Site staff assume the driver has seen them. Forklift drivers assume they've got priority because they're busy.
That's why a slow, deliberate setup matters more than a clever correction halfway through. If the approach is poor, stop and reset.
Key checks before reversing:
Blind-side risk. Know where your view is weakest and who could enter it.
Pedestrian drift. Watch for people taking shortcuts behind the unit.
Ground edges. Broken kerbs, drain covers, dock plates, soft shoulders.
Trailer swing. Don't just watch where the rear is going. Watch what the front corners will hit.
Stop before the manoeuvre if the plan isn't clear. It's easier to explain a pause than explain an injury.
Loading and load security
A stationary vehicle can become unstable very quickly. Uneven loading, poor weight distribution, damaged pallets, unsecured plant, mixed freight, and hasty restraint choices all create risk.
Hazard identification here means asking practical questions, not trusting appearances:
Is the load stable before restraint is applied?
Are the restraint methods right for the type of load, not just available?
Could anything shift when curtains or doors are opened?
Has site equipment changed the load condition since departure?
Are there signs of crushing points around tail-lifts, Moffett work, or FLT loading?
If you carry specialised goods, the details tighten further. ADR drivers must think beyond the basic load check. Placards must be visible where required, incompatible materials can't be treated as another mixed load problem, and any spill or leak changes the site from a loading task to an emergency response situation.
Coupling and uncoupling
This is a familiar job, which is exactly why people cut corners. The danger is often in what looks normal. An uneven trailer height. A line routed badly. Landing legs not fully managed. A ground surface that shifts under pressure.
Use a pause point before and after coupling. Don't rely on memory. Confirm what's locked, what's connected, and what still has stored energy or movement potential.
Departing the site
The last hazard on site is often the one drivers stop looking for. They've loaded, signed, strapped, and now mentally they're already on the road.
Before leaving, check:
Has the load changed during handling?
Are all restraints still seated correctly?
Are doors, curtains, tail-lifts, and equipment secure?
Has the route out changed because of plant, pedestrians, or queued vehicles?
The departure phase catches tired thinking. Treat it like a fresh task, not the end of the old one.
From Spotting to Action Control and Report
Spotting a hazard is only half the job. If nothing changes after you spot it, then hazard identification hasn't protected anyone.
The practical way to think is simple. Once you identify a hazard, decide whether you can eliminate it, reduce it, isolate it, or control it. That order matters because the closer you get to removing the hazard entirely, the less you depend on luck and memory.
A simple action test
Use this quick decision ladder:
Eliminate Can the task stop until the hazard is removed? If a trailer defect makes it unsafe, don't move it just because the schedule is tight.
Reduce If you can't remove it completely, can you lower the risk? Slower speed on a poor surface. A different route through a yard. Better load restraint.
Isolate Can you separate people from the hazard? Barriers, exclusion zones, keeping pedestrians out of a reversing area.
Control If the hazard remains, what procedure keeps it managed? A banksman, a documented safe system, PPE, or a temporary instruction.
When to stop work
Drivers sometimes worry that stopping work makes them look awkward. In a good operation, it makes you look competent.
Stop when:
You don't understand the site instruction
The load looks unstable or has shifted
You can see a leak, defect, or damage that changes safety
Pedestrians and vehicles are mixing without control
You've lost confidence in the manoeuvre or the conditions
Reporting a hazard early is professional judgement, not fuss.
Reporting near misses matters
A lot of operations only talk seriously once there's damage. That's too late. Near misses are where the learning is cheapest.
If a yard layout causes repeated confusion, report it. If the same customer site gives poor directions, report it. If a strap point, dock edge, or crossing route keeps creating the same risk, report it before somebody pays for the lesson physically.
Clear reporting should answer four things:
What was the hazard?
Where was it?
What made it risky at that moment?
What control was used, or what fix is needed?
That's how you turn one driver's observation into a safer system for the next driver.
If you want to build these habits properly, from eyesight standards and walkround discipline to site safety and licence progression, HGV Learning offers UK-wide training support for new and experienced drivers working towards safer, more confident, DVSA-aligned driving.
Related Articles
16/10/2026
What Age Can You Start HGV Driver Training? A 2026 UK Guide to Licence Age Requirements
If you're asking what age you can start HGV driver training, the honest answer depends on which licence you're after. A C1 licence, covering vehicles...